Jenkins: Windows as Slave Node-
Jenkins Master comes with the basic installation and you can configure project as per your requirement. Jenkins Master handles all the configuration and task for your build.
Now, sometime you need to have Slave Windows Jenkins to run project that really need Windows environment to execute some script, command etc.
In Jenkins Master and Slave environment you can configure multiple project with different OS environment. Jenkins Master use JNLP (JAVA Network Launch Protocol) agent to communicate with Slave node.
Jenkins Master is to schedule all the build job and assign Slave node for specific Project. It is easier to take online and offline slave node as per requirement. To avoid manual start of JNLP we can install it as a service and Slave node can easily come online after a reboot.
Let's start setting up Jenkins Slave on Windows while Master on Linux.
Prerequisites-
- Jenkins Master on Linux (IP-192.168.102.12)
- Windows Machine - IP 10.0.1.107 (JAVA Must be installed)
- Login to Jenkins Master > Manage Jenkins > Manage Plugins

- At Plugins page select Available > in the filter search - type Windows Slaves > Install without restart

- Login to Jenkins as admin
- Manage Jenkins > Configure Global Security
- On the next screen select TCP port for JNLP agents > Random > Apply > Save

Step 3- Add Windows node to Master Jenkins.
- Login to Jenkins Master > Manage Jenkins > Manage Nodes

- On next screen click on new node > Node Name (i.e. Windows-Agent)

- On the Next Scree fill the node details

- At next Screen click on Launch

- It will download the file Slave-Agent.jnlp
- Copy slave-agent.jnlp to the Windows machine.
- Before starting agent installation at Windows make sure, Windows machine have JAVA installed, If not please download and install Java.
- Download and install Java from the following link.
http://javadl.oracle.com/webapps/download/AutoDL?BundleId=230542_2f38c3b165be4555a1fa6e98c45e0808

- Once Java installation finished. Go to Java path: C:\Program Files\Java\jre1.8.0_161\bin
- Right click on JAVA.exe executable file and send shortcut to desktop
- Now right click on Java shortcut available at desktop and modify target.

- Now Right click on Java shortcut at desktop and Launch it.

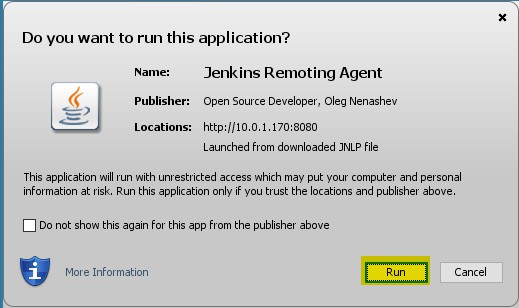
- At next Screen click Run
- On the Next Page you see that your agent is now connected with Jenkins Master.
- Let's install the Jenkins slaves as a service so that whenever your Windows machine get restarted. Slave Agent come online automatic.

- To Install Jenkins Slave service - File > Install as a service > OK
- Jenkins Slave service installation will be complete and you will see jenkinsslave-C__Jenkins in Services console.
- Go to Run > Services.msc

- Let's check Node status in the Master Jenkins

Jenkins Windows Slave Node installation process completed.
Troubleshooting:
You may experience some issues during service installation process.

- If you ran into the same issue while installing jenkins slave service please follow the steps.
- Open command prompt as Administrator.

- Change the directory (cd C:\Users\asingh\Desktop) to desktop Java shortcut.
- Run the shortcut - It will finish the installation.

- After jenkins Slave service successful installation, you will see the slaves service in services console.

- Let's check Node status in the Master Jenkins
- Login to Jenkins Master > Manage Jenkins > Manage Nodes

I think you have a long story to share and i am glad after long time finally you cam and shared your experience.
ReplyDeleteDevOps Training in Pune
DevOps Online Training
Nice explanation,it saved my time dude.
ReplyDeleteThanks
A very awesome blog post. We are really grateful for your blog post. You will find a lot of approaches after visiting your post. I was exactly searching for. Thanks for such post and please keep it up. Great work cloud and linux hosting
ReplyDeleteNice post, going to implement it tomorrow
ReplyDeleteWhat as up, I read your blogs like every week. Your writing style is awesome, keep up the good work!
ReplyDeleteHibernate training
Hyperion ESS Base online training
Hyperion ESS Base training
Hyperion Fdqm online training
This is most informative and also this post most user friendly and super navigation to all posts.
ReplyDeleteData Science
Selenium
ETL Testing
AWS
Python Online Classes
Looking forward to reading more from your blog in the future. Keep up the excellent work!" Visit to Selenium Classes in Pune
ReplyDeleteReally liked this post, it was both informative and easy to follow. It’s always interesting to see how different topics evolve with time. Digital Marketing is playing a big role in shaping modern industries. Digital Marketing Course in pune offers great opportunities to learn these skills. A professional Digital Marketing Institute in Pune helps in building a strong base, and the Best Digital Marketing Institute focuses on real-world application.
ReplyDelete