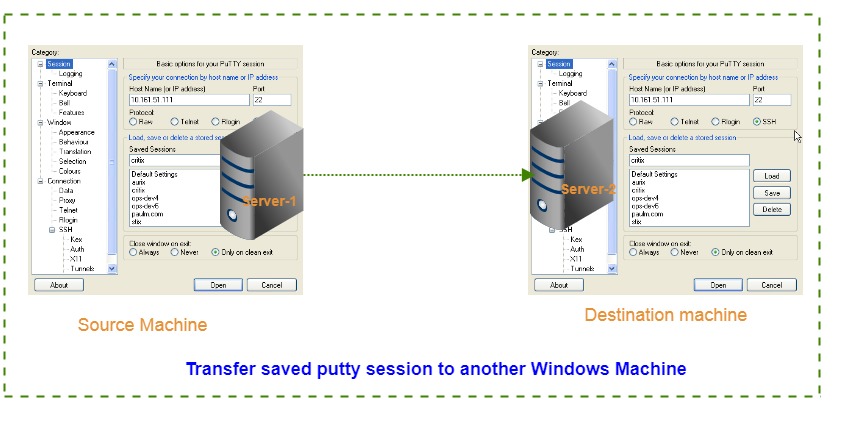
Putty Session Transfer - Putty is a terminal emulator application which acts as a client for SSH connection and to control router and switches remotely.
Though, sometime an IT administrator may require to transfer their saved putty session to another windows machine.
Default registry location for saved Putty session as follows:
Step 1- Export Putty session on source Windows:
In order to transfer putty session first, you need to export all the saved session on source windows machine. Let's follow the steps below to export.
 Verify the file using the command below:
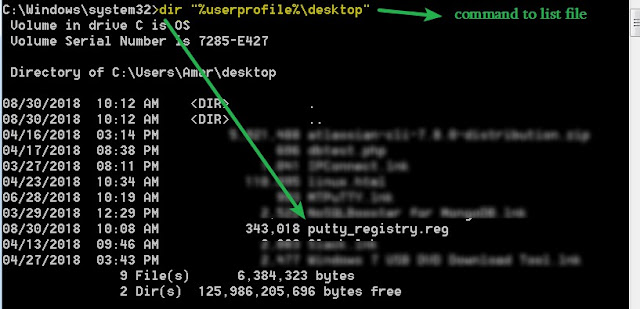 Successfully exported saved Putty session to current user's desktop and file name - putty_registory.reg
Step 3- Transfer exported file to another windows machine.
After successfully file export, please transfer the export file to the remote computer. either you can transfer file using USB or over the network. In my case, my both computer are on the same network and I did transfer over the network.
Step 4- Import the .reg file to the destination machine.
On the destination system go to the folder where you copied exported file name- putty_registry.reg
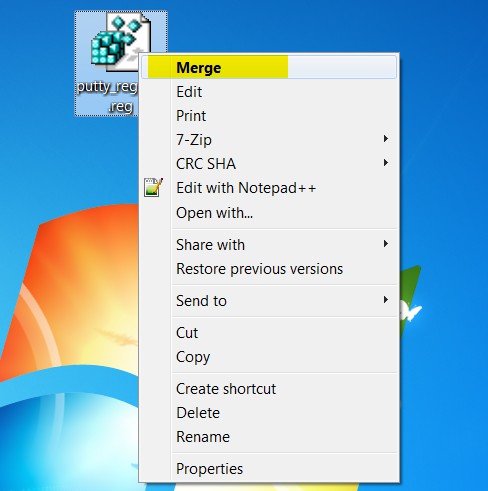
Now, right click on the file and click on the merge option as in below picture. after successful import of the file open your Putty software and you will find all the exported session there.
Now you have successfully exported your session to another windows machine.
Optional- If you have some saved session using.PPK file, In such Case please transfer yours.PPK file to the destination computer in the same folder hierarchy
Example-
Source machine structure-
Destination machine Structure
After transferring all the .PPK file, yours all putty session will work successfully.
Thanks for reading my blog, please comment and suggest to make it better
Though, sometime an IT administrator may require to transfer their saved putty session to another windows machine.

Default registry location for saved Putty session as follows:
Step 1- Export Putty session on source Windows:
In order to transfer putty session first, you need to export all the saved session on source windows machine. Let's follow the steps below to export.
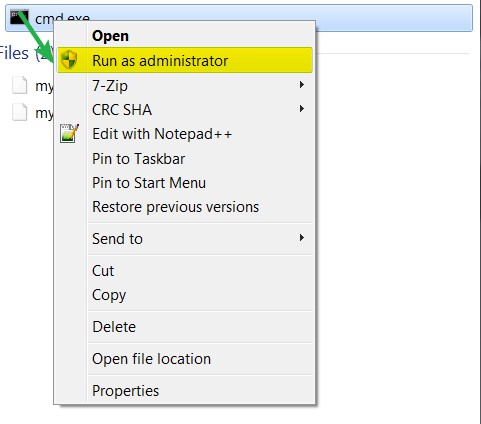
- Open CMD as administrator:

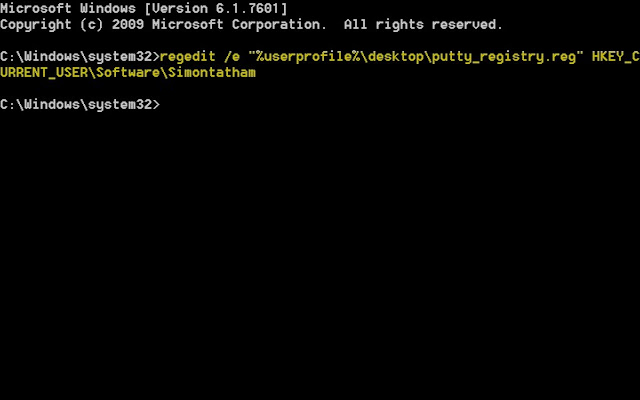
Step 2- use this command and press the enter key. It will save exported .reg file on the current user's desktop.


Step 3- Transfer exported file to another windows machine.
After successfully file export, please transfer the export file to the remote computer. either you can transfer file using USB or over the network. In my case, my both computer are on the same network and I did transfer over the network.
Step 4- Import the .reg file to the destination machine.
On the destination system go to the folder where you copied exported file name- putty_registry.reg
Now, right click on the file and click on the merge option as in below picture. after successful import of the file open your Putty software and you will find all the exported session there.

Now you have successfully exported your session to another windows machine.
Optional- If you have some saved session using.PPK file, In such Case please transfer yours.PPK file to the destination computer in the same folder hierarchy
Example-
Source machine structure-
Destination machine Structure
After transferring all the .PPK file, yours all putty session will work successfully.
Thanks for reading my blog, please comment and suggest to make it better
No comments:
Post a Comment