Thursday, June 22, 2017

How to setup Rsync to Sync directories between two Ubuntu Linux Server Without Password

What is Rsync: -
Rsync stands for Remote Sync is a synchronizer tool to sync data local to remote server and Vice-versa. 
It helps us to sync data faster by syncing only modify and newly add file or directories.


Prerequisites: -
1- Two Linux Server 
2- Sudo privileges user
3- Rsync package installed on both the server

In my case, I am using Two Ubuntu 16.04 LTS.

Server-A -192.168.102.10                        UserName- user1
Server-B - 192.168.102.11                       UserName- user2

Step: 1- Install Rsync tool
Server A -192.168.102.10-   SSH to Server A and run command below
user1@US16:~$ sudo apt install rsync
Server B -192.168.102.11-   SSH to Server B and run command below
user2@Server16:~$ sudo apt install rsync

Step: 2- Configure without password login Server-A to Server-B.

Server A -192.168.102.10Server A Generate Public and Private Key using the command below, and hit the enter button for each prompt.


user1@US16:~$ ssh-keygen
Generating public/private rsa key pair.
Enter file in which to save the key (/home/user1/.ssh/id_rsa):
Created directory '/home/user1/.ssh'.
Enter passphrase (empty for no passphrase):
Enter same passphrase again:
Your identification has been saved in /home/user1/.ssh/id_rsa.
Your public key has been saved in /home/user1/.ssh/id_rsa.pub.
The key fingerprint is:
SHA256:v7JEcHi/VJmEdiyiIQTA/Y6rQsOpR2MSONmiuVHQrdQ user1@US16
The key's randomart image is:
+---[RSA 2048]----+
|ooo=.      o.    |
|..o.E ... +.oo   |
|.= ...oooo o+    |
|* +  ..+ . .     |
|o*. o   S o      |
|==+. . . o .     |
|o*...   . o      |
|+ ..   ..  .     |
|.o.     .o.      |
+----[SHA256]-----+
user1@US16:~$

Let's copy public key from Server A to Server B using the command below.
Server-A
user1@US16:~$ ssh-copy-id user2@192.168.102.11
/usr/bin/ssh-copy-id: INFO: Source of key(s) to be installed: "/home/user1/.ssh/id_rsa.pub"
The authenticity of host '192.168.102.11 (192.168.102.11)' can't be established.
ECDSA key fingerprint is SHA256:xaB8bGd7f6A/49x402pzRe0ibgri0OfANsmI5G7AYOg.
Are you sure you want to continue connecting (yes/no)? yes
/usr/bin/ssh-copy-id: INFO: attempting to log in with the new key(s), to filter out any that are already installed
/usr/bin/ssh-copy-id: INFO: 1 key(s) remain to be installed -- if you are prompted now it is to install the new keys
user2@192.168.102.11's password: ******

Number of key(s) added: 1

Now try logging into the machine, with:   "ssh 'user2@192.168.102.11'"
and check to make sure that only the key(s) you wanted were added.

user1@US16:~$

Let's Check SSH From Server A to Server B
Server-A
user1@US16:~$ ssh user2@192.168.102.11
Welcome to Ubuntu 16.04.1 LTS (GNU/Linux 4.4.0-62-generic x86_64)

 * Documentation:  https://help.ubuntu.com
 * Management:     https://landscape.canonical.com
 * Support:        https://ubuntu.com/advantage

111 packages can be updated.
0 updates are security updates.


*** System restart required ***
Last login: Thu Jun 22 16:32:43 2017 from 192.168.102.10

user2@Server16:~$ who
user2    pts/1        2017-06-22 17:09 (192.168.102.10)
user2@Server16:~$

SSH working fine without password!!


Step: 3- Use Rsync to copy data Local to Remote Server.

I have a directory name rsynctest and sub-directory a, b, and c on my local Server. 
Server-A
user1@US16:~$ ls -l rsynctest/
total 12
drwxrwxr-x 2 user1 user1 4096 Jun 22 07:37 a
drwxrwxr-x 2 user1 user1 4096 Jun 22 07:37 b
drwxrwxr-x 2 user1 user1 4096 Jun 22 07:37 c
user1@US16:~$

Let's Sync directory rsynctest to Remote Server using command below
Server-A
user1@US16:~$ rsync -avzh rsynctest/ user2@192.168.102.11:/home/user2/rsynctest
sending incremental file list
created directory /home/user2/rsynctest
./
a/
b/
c/

sent 123 bytes  received 75 bytes  132.00 bytes/sec
total size is 0  speedup is 0.00

Where switches as follow
-a, --archive               archive mode;
-v, --verbose               increase verbosity
-z, --compress              compress file data during the transfer
-H, --hard-links            preserve hard links


Check synced directory on Server B
Server-B
user2@Server16:~$ ls -l rsynctest/
total 12
drwxrwxr-x 2 user2 user2 4096 Jun 22 18:07 a
drwxrwxr-x 2 user2 user2 4096 Jun 22 18:07 b
drwxrwxr-x 2 user2 user2 4096 Jun 22 18:07 c
user2@Server16:~$

All three directory synced successfully from Server A to Server B

Step: 4- Use Rsync to copy data Remote to Local Server.
 Let's create a new directory or file over Server B
Server-B
user2@Server16:~$ cd rsynctest
user2@Server16:~/rsynctest$ mkdir s2d
user2@Server16:~/rsynctest$ ll
total 24
drwxrwxr-x 6 user2 user2 4096 Jun 22 22:00 ./
drwxr-xr-x 5 user2 user2 4096 Jun 22 18:11 ../
drwxrwxr-x 2 user2 user2 4096 Jun 22 18:07 a/
drwxrwxr-x 2 user2 user2 4096 Jun 22 18:07 b/
drwxrwxr-x 2 user2 user2 4096 Jun 22 18:07 c/
drwxrwxr-x 2 user2 user2 4096 Jun 22 22:00 s2d/

Server-A
 Run command below to sync newly added directory 
user1@US16:~$ rsync -avzh user2@192.168.102.11:/home/user2/rsynctest/ /home/user1/rsynctest/
receiving incremental file list
./
s2d/

sent 34 bytes  received 137 bytes  114.00 bytes/sec
total size is 0  speedup is 0.00

Newly added directory successfully synced to Server A, check using command ls -l
user1@US16:~$ ls -l rsynctest/
total 16
drwxrwxr-x 2 user1 user1 4096 Jun 22 07:37 a
drwxrwxr-x 2 user1 user1 4096 Jun 22 07:37 b
drwxrwxr-x 2 user1 user1 4096 Jun 22 07:37 c
drwxrwxr-x 2 user1 user1 4096 Jun 22 11:30 s2d

!!!Rsync has been successfully setup between two servers without password!!!


Wednesday, June 21, 2017

How to Create Apache Self Signed SSL Certificate Ubuntu 16.04 LTS

Introduction: -
SSL is an essential part of creating a secure Apache website. SSL certificates allow you encrypt all the traffic sent to and from your Apache website to prevent others from viewing all of the traffic. It uses public key cryptography to establish a secure connection. This means that anything encrypted with a public key (the SSL certificate) can only be decrypted with the private key (stored only on the server) and vice versa.

Prerequisites: -
Before start creating SSL certificate, following are the prerequisites:

1- Sudo privileges user
2- Installed Apache
3- Installed OpenSSL


Step 1: Install Apache
We need to install Apache web server if don't have already. This can be done by using the command below.
root@US16:~# apt install apache2
Step 2: Install OpenSSL
 We need OpenSSL to generate a self-signed certificate, Use the command below to install it.
root@US16:~# apt install openssl
Step 3: Create Virtual Host
First, We need to have a Virtual Host where we will install our Self-Signed Certificate, follow the steps below to setup new VHost.

3A-  Create a directory to store VHost data
root@US16:~# mkdir -p /var/www/html/vhost1
3B- Create VHost and add configuration
root@US16:~# vi /etc/apache2/sites-available/vhost1.conf
Append below VHost configuration in the file vhost1.conf 
<VirtualHost *:80>
    ServerAdmin amar.singh@outlook.in
    ServerName vhost1.org
    DocumentRoot /var/www/html/vhost1/
    ErrorLog /var/www/html/vhost1/logs/error.log
    CustomLog /var/www/html/vhost1/logs/access.log combined
<Directory /var/www/html/vhost1/>
    Options All
    AllowOverride All
    Require all granted
</Directory>
</VirtualHost>
Save and Exit from the file.

3C- Create a simple HTML file
root@US16:~# vi /var/www/html/vhost1/index.html
Add some text to the file 
This is Vhost1 !!Testing!!
Save and Exit from the file

3D- Enable created VHost 
root@US16:~# a2ensite vhost1.conf
Enabling site vhost1.
To activate the new configuration, you need to run:
  service apache2 reload
root@US16:~#
3E- Reload Apache service to apply changes
root@US16:~# service apache2 reload
3F- Test VHost by hitting Server name- http://vhost1.org/
By hitting URL- http://vhost1.org/ you will get output like below


Step 4: Create the SSL Certificate
SSL is a combination of Public and Private Key, Private Key stored only on the Server. 
Let's create Certificate by using the single command below:
root@US16:~# openssl req -x509 -nodes -days 365 -newkey rsa:2048 -keyout /etc/ssl/private/vhost1.key -out /etc/ssl/certs/vhost1.crt
Generating a 2048 bit RSA private key
.........+++
..+++
writing new private key to '/etc/ssl/private/vhost1.key'
-----
You are about to be asked to enter information that will be incorporated
into your certificate request.
What you are about to enter is what is called a Distinguished Name or a DN.
There are quite a few fields but you can leave some blank
For some fields there will be a default value,
If you enter '.', the field will be left blank.
-----
Country Name (2 letter code) [AU]:IN
State or Province Name (full name) [Some-State]:Delhi
Locality Name (eg, city) []:South Ex
Organization Name (eg, company) [Internet Widgits Pty Ltd]:ISTM
Organizational Unit Name (eg, section) []:IT
Common Name (e.g. server FQDN or YOUR name) []:vhost1.org
Email Address []:amar.singh@outlook.in
root@US16:~#

You will be prompted to enter your organisational information and a common name. The common name should be the fully qualified domain name for the site you are securing (www.mydomain.com). You can leave the email address, challenge password, and optional company name blank. When the command is finished running, it will create two files: a mysitename.key file and a mysitename.crt self-signed certificate file valid for 365 days.

Step 5: Configure Apache to use SSL
5A- Enable Port listening 
root@US16:~# vi /etc/apache2/ports.conf
Add the highlighted line to the ports.conf file.
Listen 80
Listen 443

<IfModule ssl_module>
        Listen 443
</IfModule>

<IfModule mod_gnutls.c>
        Listen 443
</IfModule>
Save and Exit from the File
5B- Enable SSL module
root@US16:~# a2enmod ssl
5C-  Change VHost Configuration
root@US16:~# vi /etc/apache2/sites-available/vhost1.conf
Append line below in the conf file
<VirtualHost 192.168.102.10:443>
DocumentRoot /var/www/html/vhost1/
ServerName vhost1.org
SSLEngine on
SSLCertificateFile /etc/ssl/certs/vhost1.crt
SSLCertificateKeyFile /etc/ssl/private/vhost1.key
</VirtualHost>
Save and Exit from the File
5C- Restart Apache service to apply changes.
root@US16:~# service apache2 restart
Step 6: Test installed SSL certificate 
To validate installed SSL certificate access website by hitting URL- https://vhost1.org/

Once everything goes well you will get output like below:


SSL Certificate has been installed successfully, let's proceed it by clicking on the Advanced button and add it to the exception to view the website. 

Once done you will get the output as bellow:


!!! Self-signed SSL has been configured successfully !!!

Tuesday, June 20, 2017

Error - Could not get lock /var/lib/dpkg/lock - open (11: Resource temporarily unavailable) or Unable to lock the administration directory (/var/lib/dpkg/), is another process using it?

Error -  Unable to lock the administration directory (/var/lib/dpkg/), is another process using it?


or -  Error - Could not get lock /var/lib/dpkg/lock - open (11: Resource temporarily unavailable)


You May experience error above during execution of apt command in Ubuntu. 


root@US16:~# apt install apache2
E: Could not get lock /var/lib/dpkg/lock - open (11: Resource temporarily unavailable)
E: Unable to lock the administration directory (/var/lib/dpkg/), is another process using it?


Solution: -  Previous apt command might be interrupted in middle somehow and it keeps the lock file exist. remove lock file using the command below.


root@US16:~# mv /var/lib/dpkg/lock /var/lib/dpkg/lock-bak


Now retry command to install package
root@US16:~# apt install apache2
Reading package lists... Done
Building dependency tree
Reading state information... Done
The following additional packages will be installed:
  apache2-bin apache2-data apache2-utils libapr1 libaprutil1 libaprutil1-dbd-sqlite3 libaprutil1-ldap liblua5.1-0 ssl-cert
Suggested packages:
  www-browser apache2-doc apache2-suexec-pristine | apache2-suexec-custom openssl-blacklist
The following NEW packages will be installed:
  apache2 apache2-bin apache2-data apache2-utils libapr1 libaprutil1 libaprutil1-dbd-sqlite3 libaprutil1-ldap liblua5.1-0 ssl-cert
0 upgraded, 10 newly installed, 0 to remove and 189 not upgraded.
Need to get 1,557 kB of archives.
After this operation, 6,428 kB of additional disk space will be used.
Do you want to continue? [Y/n] y

Command executed successfully with error, Issue solved


!!!!That's ALL!!!!

Thursday, June 15, 2017

How to Setup MySQL 5.7 Master/Master Replication Ubuntu 16.04 LTS

MySQL Replication: - Master / Master Replication

Master / Master MySQL Replication used to achieve high-availability (HA).
1- Applications can read from both masters
2- Distributes write load across both master nodes.
3- Simple, automatic and quick failover.

Requirement: -

 For MySQL Master - Master replication required two servers, it could be VPS, VMs and hosted server at any Cloud.

1- Server A (10.0.1.168) - Master-1
2- Server A (10.0.0.116) - Master -2

Step 1. Installing MySQL Server: -

Use the following command to install MySQL on both the servers:

Or you can follow this link to install MySQL: Install MySQL

root@ip-10-0-1-168:~# apt install mysql-server

Once the installation has done on Server A and Server B, Let's make the changes in my.cnf file as follow:

Step 2. Create database

Let's create  a database that we will replicate:
Server A 

mysql> create database db11;
Query OK, 1 row affected (0.00 sec)

Check created database using command below

mysql> show databases;
+--------------------+
| Database           |
+--------------------+
| information_schema |
| db11               |
| mysql              |
| performance_schema |
| sys                |
+--------------------+
6 rows in set (0.00 sec)

Step 3. Configuration changes:

Server A 
root@ip-10-0-1-168:~# vi /etc/mysql/my.cnf
Append the below config in the end of my.cnf file
[mysqld]
bind-address = 0.0.0.0
server-id = 1
log-bin="mysql-bin"
binlog-do-db=db11
binlog-ignore-db=information_schema
replicate-ignore-db=test
replicate-ignore-db=information_schema
relay-log="mysql-relay-log"
auto-increment-increment = 2
auto-increment-offset = 1

 Save and Exit from the file
Restart Mysql service to apply changes
root@ip-10-0-1-168:~# systemctl restart mysql.service
Server B
Append the below config in the end of my.cnf file
root@ip-10-0-0-116:~# vi /etc/mysql/my.cnf

[mysqld]
bind-address = 0.0.0.0
server-id = 2
log-bin="mysql-bin"
binlog-do-db=db11
binlog-ignore-db=test
binlog-ignore-db=information_schema
replicate-ignore-db=information_schema
relay-log="mysql-relay-log"
auto-increment-increment = 2
auto-increment-offset = 2


 Save and Exit from the file
Restart Mysql service to apply changes

root@ip-10-0-0-116:~# systemctl restart mysql.service

Step 4. Create the replicator user

you need to do is to create the replicator user in either Server A and Server B. You can do that using MySql shell using the following commands:
Server A 
mysql> CREATE USER 'replicator'@'%' IDENTIFIED BY '[password]';
Query OK, 0 rows affected (0.01 sec)

mysql> GRANT REPLICATION SLAVE ON *.* TO 'replicator'@'%' IDENTIFIED BY '[password]';
Query OK, 0 rows affected, 1 warning (0.00 sec)

Server B
mysql> CREATE USER 'replicator'@'%' IDENTIFIED BY '[password]';
Query OK, 0 rows affected (0.01 sec)

mysql> GRANT REPLICATION SLAVE ON *.* TO 'replicator'@'%' IDENTIFIED BY '[password]';
Query OK, 0 rows affected, 1 warning (0.00 sec)

Step 5. Backup database db11 from Server A and Restore over Server B:

Server A Take the backup of database using command below
root@ip-10-0-1-168:~# mysqldump -u root -p db11>db11.sql

Server B

First, create database with same Name (db11)
mysql> create database db11;
Query OK, 1 row affected (0.01 sec)
mysql>

Let's restore backup to this Database
root@ip-10-0-0-116:~# mysqldump -u root -p db11<db11.sql
Enter password:  *****
-- MySQL dump 10.13  Distrib 5.7.18, for Linux (x86_64)
--
-- Host: localhost    Database: db11
-- ------------------------------------------------------
-- Server version       5.7.18-0ubuntu0.16.04.1-log

/*!40101 SET @OLD_CHARACTER_SET_CLIENT=@@CHARACTER_SET_CLIENT */;
/*!40101 SET @OLD_CHARACTER_SET_RESULTS=@@CHARACTER_SET_RESULTS */;
/*!40101 SET @OLD_COLLATION_CONNECTION=@@COLLATION_CONNECTION */;
/*!40101 SET NAMES utf8 */;
/*!40103 SET @OLD_TIME_ZONE=@@TIME_ZONE */;
/*!40103 SET TIME_ZONE='+00:00' */;
/*!40014 SET @OLD_UNIQUE_CHECKS=@@UNIQUE_CHECKS, UNIQUE_CHECKS=0 */;
/*!40014 SET @OLD_FOREIGN_KEY_CHECKS=@@FOREIGN_KEY_CHECKS, FOREIGN_KEY_CHECKS=0 */;
/*!40101 SET @OLD_SQL_MODE=@@SQL_MODE, SQL_MODE='NO_AUTO_VALUE_ON_ZERO' */;
/*!40111 SET @OLD_SQL_NOTES=@@SQL_NOTES, SQL_NOTES=0 */;
/*!40103 SET TIME_ZONE=@OLD_TIME_ZONE */;

/*!40101 SET SQL_MODE=@OLD_SQL_MODE */;
/*!40014 SET FOREIGN_KEY_CHECKS=@OLD_FOREIGN_KEY_CHECKS */;
/*!40014 SET UNIQUE_CHECKS=@OLD_UNIQUE_CHECKS */;
/*!40101 SET CHARACTER_SET_CLIENT=@OLD_CHARACTER_SET_CLIENT */;
/*!40101 SET CHARACTER_SET_RESULTS=@OLD_CHARACTER_SET_RESULTS */;
/*!40101 SET COLLATION_CONNECTION=@OLD_COLLATION_CONNECTION */;
/*!40111 SET SQL_NOTES=@OLD_SQL_NOTES */;

-- Dump completed on 2017-06-15 10:19:10
root@ip-10-0-0-116:~#

Step 6. Configure Replication Server A to Server B


Server A- Side Configuration
we need to configure Server B as a slave of Server A. In order to do so, connect to Server A  console and type the following sql command:
root@ip-10-0-1-168:~# mysql -u root -p

mysql> show master status;
+------------------+----------+--------------+-------------------------+-------------------+
| File             | Position | Binlog_Do_DB | Binlog_Ignore_DB        | Executed_Gtid_Set |
+------------------+----------+--------------+-------------------------+-------------------+
| mysql-bin.000001 |      704 |              | test,information_schema |                   |
+------------------+----------+--------------+-------------------------+-------------------+
1 row in set (0.00 sec)

You will receive output as above and we need File and position section to enable replication from Server A to Server B.
Server B- Side configuration
mysql> stop slave;


CHANGE MASTER TO MASTER_HOST = '10.0.1.168', MASTER_USER = 'replicator', MASTER_PASSWORD = '[password]', MASTER_LOG_FILE = 'mysql-bin.000001', MASTER_LOG_POS = 704; START SLAVE;

Step 7. Configure Replication Server B to Server A.

 Server B- Side configuration
root@ip-10-0-0-116:~# mysql -u root -p

mysql> show master status;
+------------------+----------+--------------+-------------------------+-------------------+
| File             | Position | Binlog_Do_DB | Binlog_Ignore_DB        | Executed_Gtid_Set |
+------------------+----------+--------------+-------------------------+-------------------+
| mysql-bin.000001 |      704 |              | test,information_schema |                   |
+------------------+----------+--------------+-------------------------+-------------------+
1 row in set (0.00 sec)

Server A- Side Configuration
mysql> stop slave;

CHANGE MASTER TO MASTER_HOST = '10.0.0.116', MASTER_USER = 'replicator', MASTER_PASSWORD = '[password]', MASTER_LOG_FILE = 'mysql-bin.000001', MASTER_LOG_POS = 704; START SLAVE;


Step 8. Verify Replication Server A to Server B and vice versa.

 Server A -  Check Slave status on Server A by command below
mysql> show slave status\G
*************************** 1. row ***************************
               Slave_IO_State: Waiting for master to send event
                  Master_Host: 10.0.0.116
                  Master_User: replicator
                  Master_Port: 3306
                Connect_Retry: 60
              Master_Log_File: mysql-bin.000010
          Read_Master_Log_Pos: 318
               Relay_Log_File: mysql-relay-log.000002
                Relay_Log_Pos: 320
        Relay_Master_Log_File: mysql-bin.000010
             Slave_IO_Running: Yes
            Slave_SQL_Running: Yes
              Replicate_Do_DB:
          Replicate_Ignore_DB: test,information_schema
           Replicate_Do_Table:
       Replicate_Ignore_Table:
      Replicate_Wild_Do_Table:
  Replicate_Wild_Ignore_Table:
                   Last_Errno: 0
                   Last_Error:
                 Skip_Counter: 0
          Exec_Master_Log_Pos: 318
              Relay_Log_Space: 527
              Until_Condition: None
               Until_Log_File:
                Until_Log_Pos: 0
           Master_SSL_Allowed: No
           Master_SSL_CA_File:
           Master_SSL_CA_Path:
              Master_SSL_Cert:
            Master_SSL_Cipher:
               Master_SSL_Key:
        Seconds_Behind_Master: 0
Master_SSL_Verify_Server_Cert: No
                Last_IO_Errno: 0
                Last_IO_Error:
               Last_SQL_Errno: 0
               Last_SQL_Error:
  Replicate_Ignore_Server_Ids:
             Master_Server_Id: 2
                  Master_UUID: db835c01-50dd-11e7-88bb-12946d4e87cc
             Master_Info_File: /var/lib/mysql/master.info
                    SQL_Delay: 0
          SQL_Remaining_Delay: NULL
      Slave_SQL_Running_State: Slave has read all relay log; waiting for more updates
           Master_Retry_Count: 86400
                  Master_Bind:
      Last_IO_Error_Timestamp:
     Last_SQL_Error_Timestamp:
               Master_SSL_Crl:
           Master_SSL_Crlpath:
           Retrieved_Gtid_Set:
            Executed_Gtid_Set:
                Auto_Position: 0
         Replicate_Rewrite_DB:
                 Channel_Name:
           Master_TLS_Version:
1 row in set (0.00 sec)
Replication has been configured successfully

 Server B -  Check Slave status on Server B by command below

mysql> show slave status\G
*************************** 1. row ***************************
               Slave_IO_State: Waiting for master to send event
                  Master_Host: 10.0.1.168
                  Master_User: replicator
                  Master_Port: 3306
                Connect_Retry: 60
              Master_Log_File: mysql-bin.000014
          Read_Master_Log_Pos: 154
               Relay_Log_File: mysql-relay-log.000002
                Relay_Log_Pos: 320
        Relay_Master_Log_File: mysql-bin.000014
             Slave_IO_Running: Yes
            Slave_SQL_Running: Yes
              Replicate_Do_DB:
          Replicate_Ignore_DB: information_schema
           Replicate_Do_Table:
       Replicate_Ignore_Table:
      Replicate_Wild_Do_Table:
  Replicate_Wild_Ignore_Table:
                   Last_Errno: 0
                   Last_Error:
                 Skip_Counter: 0
          Exec_Master_Log_Pos: 154
              Relay_Log_Space: 527
              Until_Condition: None
               Until_Log_File:
                Until_Log_Pos: 0
           Master_SSL_Allowed: No
           Master_SSL_CA_File:
           Master_SSL_CA_Path:
              Master_SSL_Cert:
            Master_SSL_Cipher:
               Master_SSL_Key:
        Seconds_Behind_Master: 0
Master_SSL_Verify_Server_Cert: No
                Last_IO_Errno: 0
                Last_IO_Error:
               Last_SQL_Errno: 0
               Last_SQL_Error:
  Replicate_Ignore_Server_Ids:
             Master_Server_Id: 1
                  Master_UUID: 7b0a64f2-4dbb-11e7-8349-023b8b30f372
             Master_Info_File: /var/lib/mysql/master.info
                    SQL_Delay: 0
          SQL_Remaining_Delay: NULL
      Slave_SQL_Running_State: Slave has read all relay log; waiting for more updates
           Master_Retry_Count: 86400
                  Master_Bind:
      Last_IO_Error_Timestamp:
     Last_SQL_Error_Timestamp:
               Master_SSL_Crl:
           Master_SSL_Crlpath:
           Retrieved_Gtid_Set:
            Executed_Gtid_Set:
                Auto_Position: 0
         Replicate_Rewrite_DB:
                 Channel_Name:
           Master_TLS_Version:
1 row in set (0.00 sec)


Replication has been configured successfully on both the servers;
Now Create a Table on Server A by command below:
First Select database db11
Server A:
mysql> use db11
Database changed

Let's create a table using the command below:
mysql> CREATE TABLE pet (name VARCHAR(20), owner VARCHAR(20),species VARCHAR(20), sex CHAR(1), birth DATE, death DATE);
Query OK, 0 rows affected (0.03 sec)
Check created table by hitting below command

mysql> show tables;
+----------------+
| Tables_in_db11 |
+----------------+
| pet            |
+----------------+
1 row in set (0.00 sec)

Let's check this table on Server B:
Server B: Change database db11 using command below
mysql> use db11
Database changed
Use command below to show tables
mysql> show tables;
+----------------+
| Tables_in_db11 |
+----------------+
| pet            |
+----------------+
1 row in set (0.00 sec)


Table created over Server A has been successfully replicated to Server B

Now create a Table on Server B and check it over Server A
Server B:


mysql> CREATE TABLE pet11 (name VARCHAR(20), owner VARCHAR(20),species VARCHAR(20), sex CHAR(1), birth DATE, death DATE);
Query OK, 0 rows affected (0.02 sec)

mysql>

Let's check it over Server A


Server A
-
mysql> show tables;
+----------------+
| Tables_in_db11 |
+----------------+
| pet            |
| pet11          |
+----------------+
2 rows in set (0.00 sec)


!!! Master-Master replication has been successfully configured and verified.!!!!


Saturday, June 10, 2017

How To Install MySQL 5.7 On Ubuntu 16.04 LTS

MySQL: - 

MySQL is an open-source database management system, commonly installed as part of the popular LAMP(Linux, Apache, MySQL, PHP/Python/Perl) stack. It uses a relational database and SQL (Structured Query Language) to manage its data.

Prerequisites: -

To follow this tutorial, you will need:

One Ubuntu 16.04 server set up by following this initial server setup guide, including a sudo non-root user and a firewall.

MySQL 5.7

Step 1: - Installing MySQL
To Install MySQL simply use apt-get command as follow:
root@ip-10-0-1-168:~# apt install mysql-server
 Once you hit enter button it will prompt y/n type Y and hit enter.
root@ip-10-0-1-168:~# apt install mysql-server
Reading package lists... Done
Building dependency tree
Reading state information... Done
The following packages were automatically installed and are no longer required:
  linux-aws-headers-4.4.0-1013 linux-headers-4.4.0-1013-aws linux-image-4.4.0-1013-aws
Use 'sudo apt autoremove' to remove them.
The following additional packages will be installed:
  libaio1 libcgi-fast-perl libcgi-pm-perl libencode-locale-perl libevent-core-2.0-5 libfcgi-perl libhtml-parser-perl libhtml-tagset-perl libhtml-template-perl libhttp-date-perl
  libhttp-message-perl libio-html-perl liblwp-mediatypes-perl libtimedate-perl liburi-perl mysql-client-5.7 mysql-client-core-5.7 mysql-common mysql-server-5.7 mysql-server-core-5.7
Suggested packages:
  libdata-dump-perl libipc-sharedcache-perl libwww-perl mailx tinyca
The following NEW packages will be installed:
  libaio1 libcgi-fast-perl libcgi-pm-perl libencode-locale-perl libevent-core-2.0-5 libfcgi-perl libhtml-parser-perl libhtml-tagset-perl libhtml-template-perl libhttp-date-perl
  libhttp-message-perl libio-html-perl liblwp-mediatypes-perl libtimedate-perl liburi-perl mysql-client-5.7 mysql-client-core-5.7 mysql-common mysql-server mysql-server-5.7
  mysql-server-core-5.7
0 upgraded, 21 newly installed, 0 to remove and 38 not upgraded.
Need to get 18.9 MB of archives.
After this operation, 162 MB of additional disk space will be used.
Do you want to continue? [Y/n] Y

You'll be prompted to create a root password during the installation. Choose a secure one and make sure you remember it because you'll need it later. Next, we'll finish configuring MySQL.

- during installation, it will prompt you to set the MySql root password
mysqlpasswd.PNG


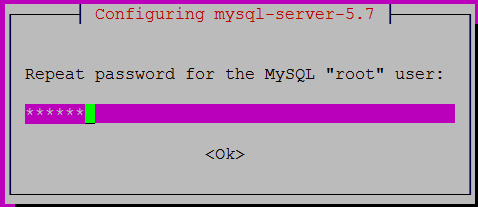
- Retype Password once prompt

mysqlpasswdretype.PNG

Step 2: - Configure MySQL
For fresh MySQL installation, We need to change the security of MySQL by using MySQL secure installation wizard:

root@ip-10-0-1-168:~# mysql_secure_installation
During the MySQL secure installation wizard change as following
Enter password for user root: ******

VALIDATE PASSWORD PLUGIN can be used to test passwords
and improve security. It checks the strength of password
and allows the users to set only those passwords which are
secure enough. Would you like to setup VALIDATE PASSWORD plugin?

Press y|Y for Yes, any other key for No:
Using existing password for root.
Change the password for root ? ((Press y|Y for Yes, any other key for No) : no

 ... skipping.
By default, a MySQL installation has an anonymous user,
allowing anyone to log into MySQL without having to have
a user account created for them. This is intended only for
testing, and to make the installation go a bit smoother.
You should remove them before moving into a production
environment.

Remove anonymous users? (Press y|Y for Yes, any other key for No) : yes
Success.


Normally, root should only be allowed to connect from
'localhost'. This ensures that someone cannot guess at
the root password from the network.

Disallow root login remotely? (Press y|Y for Yes, any other key for No) :

 ... skipping.
By default, MySQL comes with a database named 'test' that
anyone can access. This is also intended only for testing,
and should be removed before moving into a production
environment.


Remove test database and access to it? (Press y|Y for Yes, any other key for No) : no

 ... skipping.
Reloading the privilege tables will ensure that all changes
made so far will take effect immediately.

Reload privilege tables now? (Press y|Y for Yes, any other key for No) : yes
Success.

All done! 

MySQL Installation has done.

Step 3: - Test MySQL
Check MySQL service status

root@ip-10-0-1-168:~# systemctl status mysql.service
● mysql.service - MySQL Community Server
   Loaded: loaded (/lib/systemd/system/mysql.service; enabled; vendor preset: enabled)
   Active: active (running) since Sat 2017-06-10 09:04:49 UTC; 27min ago
  Process: 4981 ExecStartPost=/usr/share/mysql/mysql-systemd-start post (code=exited, status=0/SUCCESS)
  Process: 4969 ExecStartPre=/usr/share/mysql/mysql-systemd-start pre (code=exited, status=0/SUCCESS)
 Main PID: 4980 (mysqld)
    Tasks: 29
   Memory: 163.2M
      CPU: 712ms
   CGroup: /system.slice/mysql.service
           └─4980 /usr/sbin/mysqld

MySQL Version and UPTime
root@ip-10-0-1-168:~# mysqladmin -u root -p version
Enter password:
mysqladmin  Ver 8.42 Distrib 5.7.18, for Linux on x86_64
Copyright (c) 2000, 2017, Oracle and/or its affiliates. All rights reserved.

Oracle is a registered trademark of Oracle Corporation and/or its
affiliates. Other names may be trademarks of their respective
owners.

Server version          5.7.18-0ubuntu0.16.04.1
Protocol version        10
Connection              Localhost via UNIX socket
UNIX socket             /var/run/mysqld/mysqld.sock
Uptime:                 30 min 19 sec

Threads: 1  Questions: 7  Slow queries: 0  Opens: 115  Flush tables: 1  Open tables: 34  Queries per second avg: 0.003

!!! MySQL is Up and running !!!

Friday, June 9, 2017

How to Install Apache 2.4 and Configure Virtual Host in Ubuntu 16.04 LTS

Apache: - Apache HTTP Server is most commonly used an open source web server, Apache maintain and developed by the open community of the developers.

Apache provides us wide varieties to run the application written in multiple languages i.e. PHP, Perl, Python, HTM etc.  


Prerequisites: -  
1- One installed Ubuntu 16.04, VM, VPC or Dedicated server.
2- User having sudoers privileges.

Installation: -
SSH to Ubuntu box user with sudoers privileges;

Check Ubuntu Version:

Use command hostnamectl  to know installed version of Linux
root@ip-10-0-1-168:~# hostnamectl
   Static hostname: ip-10-0-1-168
         Icon name: computer-vm
           Chassis: vm
        Machine ID: 389d9e43da834a1ea663f0e6bca2d919
           Boot ID: 65a0542f675f4389ae41dcbccbb3e684
    Virtualization: xen
  Operating System: Ubuntu 16.04.2 LTS
            Kernel: Linux 4.4.0-1017-aws
      Architecture: x86-64
root@ip-10-0-1-168:~#

Step 1: - Check existing installation of Apache
We can check whether our Server already has Apache installed or not using the command below:
root@ip-10-0-1-168:~# dpkg --list apache2
dpkg-query: no packages found matching apache2
root@ip-10-0-1-168:~#
Step 2: - Install Apache 2.4
Use Command below to install Apache 2.4
root@ip-10-0-1-168:~# apt install apache2
Check Installed Apache Version: - 
root@ip-10-0-1-168:~# apache2 -v
Server version: Apache/2.4.18 (Ubuntu)
Server built:   2017-05-05T16:32:00
Check Apache Server Status: -
Using Command below, we can check apache service status
root@ip-10-0-1-168:~# systemctl status apache2.service
● apache2.service - LSB: Apache2 web server
   Loaded: loaded (/etc/init.d/apache2; bad; vendor preset: enabled)
  Drop-In: /lib/systemd/system/apache2.service.d
           └─apache2-systemd.conf
   Active: active (running) since Fri 2017-06-09 07:23:28 UTC; 4min 36s ago
     Docs: man:systemd-sysv-generator(8)
    Tasks: 55
   Memory: 6.6M
      CPU: 182ms
   CGroup: /system.slice/apache2.service
           ├─8373 /usr/sbin/apache2 -k start
           ├─8376 /usr/sbin/apache2 -k start
           └─8377 /usr/sbin/apache2 -k start

Jun 09 07:23:27 ip-10-0-1-168 systemd[1]: Starting LSB: Apache2 web server...
Jun 09 07:23:27 ip-10-0-1-168 apache2[8349]:  * Starting Apache httpd web server apache2
Jun 09 07:23:28 ip-10-0-1-168 apache2[8349]:  *
Jun 09 07:23:28 ip-10-0-1-168 systemd[1]: Started LSB: Apache2 web server.
root@ip-10-0-1-168:~#
 Ubuntu Firewall: -
Apache Sever using default port 80. To access the website from outside we need to allow Port 80 in Ubuntu Firewall (UFW).
Check Ubuntu Firewall Status using the command below:
root@ip-10-0-1-168:~# ufw status
Status: inactive
In my case Ubuntu Firewall is inactive, If Ubuntu Firewall is Active we need to allow Port 80 using the command below:
root@ip-10-0-1-168:~# ufw allow 80/tcp
Rule added
Rule added (v6)
root@ip-10-0-1-168:~#
 After adding Port 80 reload Ubuntu Firewall using below command 
root@ip-10-0-1-168:~# ufw reload
Firewall reloaded
 Checked open port status using the command below:
root@ip-10-0-1-168:~# ufw status
Status: active

To                         Action      From
--                         ------      ----
80/tcp                     ALLOW       Anywhere
22/tcp                     ALLOW       Anywhere
80/tcp (v6)                ALLOW       Anywhere (v6)
22/tcp (v6)                ALLOW       Anywhere (v6)

Check Apache server using server's IP address:
 After successful installation of Apache let's check server status:


Apache has been installed Successfully:

Step 3: - Create Virtual Host
 We need Vhost to run multiple websites on a single server-  Let's create a virtual host using the command below:
root@ip-10-0-1-168:~# vi /etc/apache2/sites-available/myvhost.conf
Append following code into this file.
<VirtualHost *:80>
    ServerAdmin amar.singh@outlook.in
    ServerName myvhost.org
    DocumentRoot /var/www/html/myvhost/
    ErrorLog /var/www/html/myvhost/logs/error.log
    CustomLog /var/www/html/myvhost/logs/access.log combined
<Directory /var/www/html/myvhost/>
    Options All
    AllowOverride All
    Require all granted
</Directory>
</VirtualHost> 
Save and Exit from File.

Enable created Virtual host:
root@ip-10-0-1-168:~# a2ensite myvhost.conf
Enabling site myvhost.
To activate the new configuration, you need to run:
service apache2 reload


Reload Apache configuring using the command below:
root@ip-10-0-1-168:~# systemctl reload apache2.service

Validate create Virtual host using server name:


!!!Apache installation and Virtual host creation have done successfully!!!

How to install MySQL: - 
https://linuxhowtoguide.blogspot.in/2017/06/how-to-install-mysql-57-on-ubuntu-1604.html